
Product

Solutions
Resources
About Us
Use Cases
Contact Us

.png)
Bringing together data from different sources like websites, offline stores, and CRMs often creates a common challenge: duplicate records. Without a shared way to identify customers, businesses end up with fragmented and inconsistent data, making it hard to get a clear picture of their audience. This problem has long been a hurdle for organizations, but with tools like Zingg and Apache Iceberg, it's now easier to detect and merge duplicates, ensuring clean and reliable customer data.
Zingg is an open-source entity resolution tool designed for modern data stacks. By connecting to diverse data sources such as Databricks, Snowflake, Cassandra, AWS S3, and Azure, Zingg ensures simple integration and supports multiple formats like Parquet, JSON, and CSV. Its ability to deduplicate and unify records across data silos empowers organizations to create consistent and accurate data views of customers, suppliers, and more.
Apache Iceberg is a high-performance table format designed for large-scale analytics. It simplifies data management by supporting schema evolution, time travel, and efficient querying without manual partition management. Iceberg's ability to handle petabyte-scale datasets makes it a perfect fit for modern data lakes.
Combining Zingg’s entity resolution with Iceberg’s robust data architecture delivers major advantages:
Zingg performs intelligent entity resolution on Iceberg tables, deduplicating records to provide consistent entity views.
Iceberg delivers fast optimized query execution, while Zingg’s ML algorithms handle efficient matching at scale.
Zingg integrates directly with Iceberg tables—no complex transformations required.
You get data lineage, schema evolution, and trustworthy master data in one workflow.
The combination ensures scalable, adaptable pipelines ready for evolving data needs.
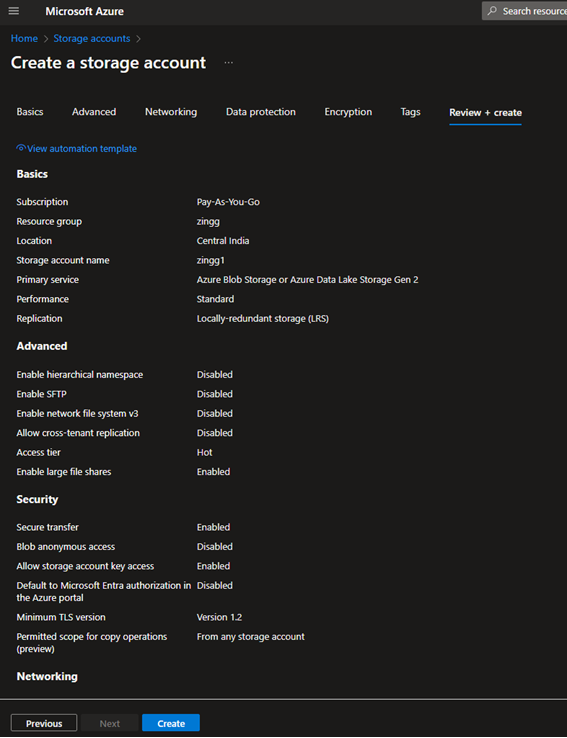
We will use Azure for storing the Iceberg data, with Snowflake managing the Iceberg tables. You can also use other services like AWS.

COMPUTE_WH warehouse
DESC VOLUME <volume_name>AZURE_CONSENT_URL) to authorize Snowflake to use Azure storageAZURE_MULTI_TENANT_APP_NAME value before the underscore
AZURE_MULTI_TENANT_APP_NAME value (before the underscore) in the Azure storage → Add role assignment section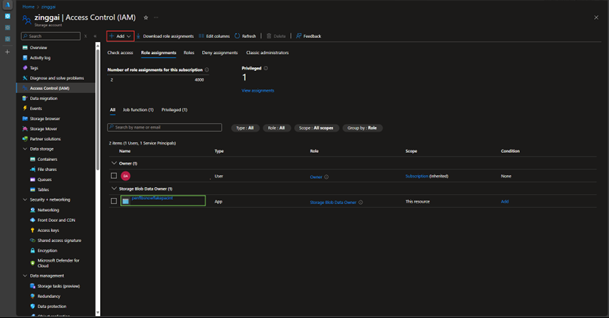
SYSTEM$VERIFY_EXTERNAL_VOLUME('azure_zingg');

Create your Iceberg table in Snowflake with the appropriate schema.

Normally this is done from some external source, but we are just loading a small dataset from test.csv.

Before setting up Zingg, you need to create a config.json file. This is the primary configuration file used to set up Zingg's matching and output processing.
This section defines the fields involved in the matching process, their properties, and how they are used:
fuzzy: Allows partial matches or minor differences (e.g., "Jon" vs. "John")exact: Requires an exact match of the valuesdont_use: Excludes the field from matchingstring for textual dataDefines how and where the results of Zingg's matching process are stored:
net.snowflake.spark.snowflake)Specifies the source data configuration:

To integrate with Snowflake, specify the required JAR files in a configuration file named props.conf. This ensures the correct dependencies are loaded when Zingg interacts with Snowflake.

The Zingg image can be pulled from Docker Hub using the following command.

Mount the required directories and start the Zingg container:

Zingg identifies sample record pairs during the findTrainingData phase, which users label as matches or non-matches. These labeled samples are then used to train Zingg's machine-learning model.
Run the findAndLabel phase using the following command:

The interactive learner minimizes user effort by selecting representative pairs. Once the job finishes, proceed to the next step, where pairs are manually labeled.

In the training phase, the labeled data is used to train Zingg's machine-learning models. Run the training phase with:

The trained models are then used to predict duplicate or matching records within the dataset. Zingg generates an output table that includes both the original columns and additional metadata.
Run the matching phase using:

To store the output in an external Iceberg table, ensure the table is created in advance. The output includes:

This approach combines Zingg's smart data deduplication and unification with Iceberg's ability to handle large datasets, making it easier to manage and clean up data. By using Docker, you get a portable environment to run Zingg, and Snowflake ensures your data is stored and processed securely.
Explore the Zingg GitHub repository to start implementing Identity RAG, and leverage the attached notebook to integrate these capabilities into your LangChain workflows.
These technologies offer a modern, flexible, and easy-to-maintain setup that helps businesses manage their data more efficiently. This solution not only improves data quality but also ensures your data pipelines are ready for future needs, making it simpler to make better data-driven decisions.

